
Supplies:
Approximately 3/4 yard fabric (I used linen suiting for the red and stretch satin for the gray but any heavier non-stretchy or slightly stretchy apparel fabric will work)Lighter fabrics like my linen will also need a lining (so that means 3/4 yard of lining fabric as well)
Coordinating thread
3 in thick elastic (and Rit dye if you feel so inclined)
Pins
A fabric or water soluble pen or marker
Pattern piece page 1
Pattern piece page 2
Download and print the pattern (please select "fill entire paper" while printing to get the correct sizing). You don't need to overlap the edges of the two papers, just line up the asterisks and the solid black lines and tape together. Cut off the excess to the left of the solid black line.
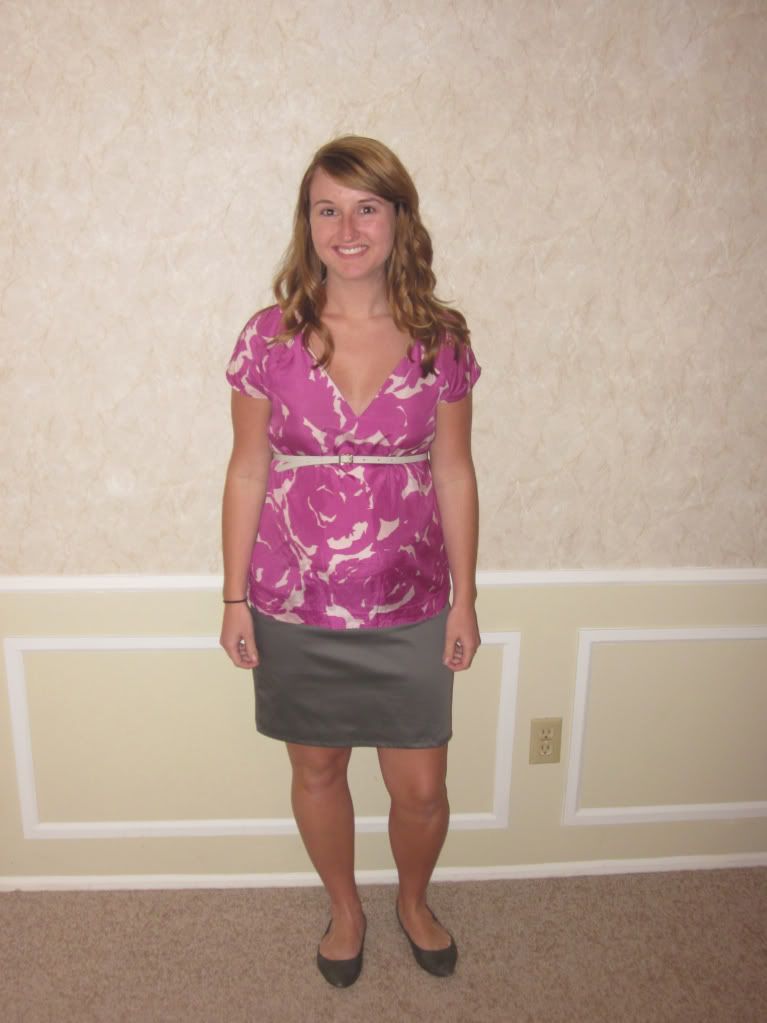
The pattern is approximately a size 4 petite -- I based it off of a non-maternity size 4 petite skirt that I have from Target. The length of the skirt pattern is going to be closer to the gray one (pictured below) than the red one (pictured above). I figured it's always easier to make a skirt a little shorter than longer so I'm giving you a little more margin to work with initially. A seam allowance of approximately 1/3 inch is included in the pattern.
To make the pattern bigger, smaller, shorter, or longer, just trace the pattern piece on a sheet of tissue paper and then measure out/in an inch or two, draw your new lines, and cut out your new pattern piece. Like I mentioned above, it's always better to start out too big since you can always cut a little more off, but if you start too small you're just out of luck.
Fold your (washed and dried) fabric in half and lay your pattern piece out flat on it. Pin it in place along the center fold and cut around the edge. Repin and cut a second identical pattern piece. When you take out the pins you should have two identical skirt shaped fabric pieces. Pin the right sides together and sew a straight seam down each of the sides. Now you should have a skirt shaped tube of fabric. To make the hem, fold the bottom edge of the skirt under about a 1/2 an inch and iron (this will help give you a nice smooth hem). Fold the edge over another 1/2 an inch and iron again. Sew the hem all the way around. If you are making a lining for your skirt, go back to the beginning of the directions and repeat everything for the lining up to this point.


A few notes:
I dyed my elastic so it would at least be in the same color family as my skirt. You probably won't ever be able to get it to match exactly but it can be better than bright white (although the waistband doesn't show at all anyways!).

My elastic band was slightly smaller than my skirt so I stretched it slightly as I sewed so it was somewhat even all the way around. However, don't worry if one section of your skirt is a tad more "puckered" when you sew it because once you have it on it all gets stretched out and you won't be able to tell at all.
Here's the longer (but otherwise exactly the same) gray version:

A quick note on cost:
The fabric for each skirt cost me $3.46 and the elastic was $1.37 for a total of $4.83/skirt. I had the lining left over from another project but lining is dirt cheap anyways and usually worth every penny.
No comments:
Post a Comment