It's been a while since I posted anything at all let alone a baby update. This is partly because summer is always busier than anyone ever expects it to be, and partly because everything is just peachy here in prego land and there really isn't much to report. I've been feeling great despite the heat-wave/drought of a summer we've been having. I haven't experienced any cravings (yet), but I have maintained a healthy appetite ever since the morning sickness went away. I'm caught up to where I should be weight-wise and the baby is a teensy bit on the small side but mostly right on track for size. At my last visit the doctor said she was head down and looking great -- hopefully she stays that way! I have weekly appointments every Tuesday morning now, and it doesn't seem possible that I've been pregnant long enough to be this close to having a baby! She's considered full term in 2 weeks, and her estimated due date is September 2nd. I think it would be a little hilarious if she arrived one day late and I labored on labor day...
Here are a few highlights from the summer so far:
I made a quick weekend trip to Omaha for a wonderful baby shower with family and friends at the end of June.
We spent a wonderful week over the 4th of July lounging on the beach with Isaac's family at their cottage in Pentwater, MI. Isaac's mom and my sisters-in-law also threw a lovely family shower while we were up there!
We recently had the privilege of visiting our home church, St. Paul's Lutheran Church, where Isaac delivered his first public sermon (he did great!).
On the baby-prep front, we've taken a couple classes at the hospital where we will be delivering, assembled tons of baby stuff, finished setting up the nursery nook in our room, and turned a corner of the office into a baby-item-warehouse. I'm serious about that last one, people have been SO generous both with gifts and hand-me-downs!
In the midst of everything else, Isaac has been taking summer classes at the seminary along with teaching a Latin class, and I've been working about 50 hours/week with the exception of our week-long vacation with family. Like I said, summer is always busier than you think it will be and this one has been no exception.
Tomorrow afternoon, the lovely ladies at St. Paul's are throwing us yet another baby shower (we are truly surrounded by wonderful, thoughtful, and generous friends and family!), and we are excited to see everyone in Hillsdale one last time before the baby comes. I've been restricted from traveling outside of Fort Wayne after tomorrow so you are guaranteed we'll be here for the next month, and in case you were wondering we welcome visitors! :)
Saturday, July 28, 2012
Wednesday, June 13, 2012
build | cubby bookshelf
I've been wanting/needing a cubby bookshelf for our in-progress nursery nook. Really I just needed some type of storage for our growing supply of baby stuff, but I wanted a cubby bookshelf a la:
However, along with our limited budget we also have limited space. I wanted something that would offer versatile storage (room for books, baskets for onsies, burp cloths, etc.) without getting too crowded in our little nursery corner. I found a perfect 4 cubby bookshelf plan from Ana White that I could build for less than $20 worth of lumber (I already had nails, screws, wood glue, primer, paint, etc. leftover from other projects). I love that it's very similar to the top half of the Pottery Barn version (which is all we had room for anyways), and it gives us a place to put the lamp and alarm clock which were previously sitting on top of the clothes hamper. That situation wasn't exactly ideal because then all our dirty laundry ended up on the floor. Oh, you say we could have just moved the lamp whenever we wanted to put clothes in the hamper? Haha, good one...
I painted the bookshelf to match the dresser/changing table so that we'll have a matching set when we move baby girl into her own room.
A few tips if you decide to build this bookshelf for yourself:
1) Originally I was just going to build the basic frame and leave off the front and back faceplates to save money. Don't. The faceplate makes it look finished and professional and is worth the extra $3 in 1x2 boards. However, I did not build the faceplate for the back because ours will always be facing the wall and no one will ever see it.
2) Take the time to carefully fill in all your holes with wood putty, sand well, and use a good primer before you paint. I always use cheap-o Wal-Mart paint (I love it!) but a decent primer makes all the difference in how my projects come out in the end. In the past I haven't always taken the time to prime because I hated the extra step, but it makes a huge difference in the finished quality.
3) It really helps to have a second person around for the assembly part of larger projects like this one. Especially if you're 7 months pregnant but even if you aren't. One person can easily do all the preliminary measuring, pre-drilling, faceplate, finishing, etc, but it's a lot easier to get the main frame boards lined up properly if you have someone holding everything together and making sure nothing shifts while you're assembling.
| via Pottery Barn |
I painted the bookshelf to match the dresser/changing table so that we'll have a matching set when we move baby girl into her own room.
A few tips if you decide to build this bookshelf for yourself:
1) Originally I was just going to build the basic frame and leave off the front and back faceplates to save money. Don't. The faceplate makes it look finished and professional and is worth the extra $3 in 1x2 boards. However, I did not build the faceplate for the back because ours will always be facing the wall and no one will ever see it.
2) Take the time to carefully fill in all your holes with wood putty, sand well, and use a good primer before you paint. I always use cheap-o Wal-Mart paint (I love it!) but a decent primer makes all the difference in how my projects come out in the end. In the past I haven't always taken the time to prime because I hated the extra step, but it makes a huge difference in the finished quality.
3) It really helps to have a second person around for the assembly part of larger projects like this one. Especially if you're 7 months pregnant but even if you aren't. One person can easily do all the preliminary measuring, pre-drilling, faceplate, finishing, etc, but it's a lot easier to get the main frame boards lined up properly if you have someone holding everything together and making sure nothing shifts while you're assembling.
Monday, May 21, 2012
sew | nursery bedding set
Even though we decided to find out the gender of our baby at the 20 week ultrasound (girl by the way, for anyone who missed the news!), Isaac and I decided that we want to keep most of our baby gear (nursery set, stroller, car seat, etc.) gender neutral since we hope to have many babies that will end up using the gear. As much as I do like pink in moderation, I wouldn't have wanted an all pink nursery anyways so gender neutral works out pretty well.
As you may recall, I really love Pottery Barn. Pottery Barn Kids has the best gender neutral nursery bedding (ok, forget gender neutral, they have the best bedding, period) I have seen anywhere. My absolute favorite is their Harper bedding in green. Seriously, how great is this stuff?
So fresh, so cute, so.......expensive. Let's pretend for a second that I might actually consider shelling out the $290.50 for the whole set. We would still have a couple problems. Problem #1: the bumpers (my favorite part of the whole set even if you can only use them for a couple months) won't fit our sleigh style crib. Problem #2: ok, stop pretending, I don't actually have $290.50 to spend on a crib set. So I guess that's the bigger problem.
However, the more I looked at the set the more I realized that it was just straight lines of green ribbon sewn on a plain white crib set. Hmmm. How hard could that be?
Turns out not too difficult, but it was alittle incredibly time consuming and tedious getting all that ribbon straight and evenly spaced. This was definitely not an instant gratification project (like most of the projects I do).
Here's my copycat version of the Pottery Barn Harper nursery bedding:
I spent about $60 total on fabric, ribbon, and misc. supplies. I don't know the exact breakdown of how much each nursery piece ended up costing because I bought my white fabric and ribbon in bulk. I used Offray ribbon in lemongrass and Kona premium cotton fabric in white. I used a coordinating green and white polka dot fabric from Joann Fabrics for the crib sheet.
I'll eventually put together a post with pictures of the rest of the nursery area once we get everything ready to go. :)
As you may recall, I really love Pottery Barn. Pottery Barn Kids has the best gender neutral nursery bedding (ok, forget gender neutral, they have the best bedding, period) I have seen anywhere. My absolute favorite is their Harper bedding in green. Seriously, how great is this stuff?
So fresh, so cute, so.......expensive. Let's pretend for a second that I might actually consider shelling out the $290.50 for the whole set. We would still have a couple problems. Problem #1: the bumpers (my favorite part of the whole set even if you can only use them for a couple months) won't fit our sleigh style crib. Problem #2: ok, stop pretending, I don't actually have $290.50 to spend on a crib set. So I guess that's the bigger problem.
However, the more I looked at the set the more I realized that it was just straight lines of green ribbon sewn on a plain white crib set. Hmmm. How hard could that be?
Turns out not too difficult, but it was a
Here's my copycat version of the Pottery Barn Harper nursery bedding:
I spent about $60 total on fabric, ribbon, and misc. supplies. I don't know the exact breakdown of how much each nursery piece ended up costing because I bought my white fabric and ribbon in bulk. I used Offray ribbon in lemongrass and Kona premium cotton fabric in white. I used a coordinating green and white polka dot fabric from Joann Fabrics for the crib sheet.
Here are links to all the tutorials I used to create this nursery set:
Pillow Sham (a picture of the pillow will be coming soon along with a post about the glider chair I recovered)
Bumpers
I purchased a set of Nu-Foam crib bumpers from Joann Fabrics (with a 50% off coupon, of course) and directions for making the bumpers are included in the package. In addition to the package directions, I added the ribbon detailing and white corded piping around the edge for a more finished, professional look.
Crib Skirt
This one is super easy! All I did was measure the height from the mattress platform to the floor and the length of the front of the crib. I added an extra inch to both measurements to allow for hemming all the way around and a couple more inches to the length so I could make a pleat in the center. I know most people make a full crib skirt with three (or even four) sides attached to a pannel that goes under the mattress, but because we have a lovely sleigh style crib with solid wood sides, I only wanted something to cover the open front of the crib. Also, I didn't want to worry about the crib skirt slipping around every time we needed to change the sheets so I attached the crib skirt directly to the front edge of the mattress platform with adhesive backed velcro. Now whenever we need to change the sheets the crib skirt won't budge an inch.
P.S. Just in case we needed yet another reminder that God always provides, we received our beautiful crib for free! Isaac's brother and his wife were offered the crib, but they already had one so they kindly passed it along to us. Thanks guys! I also recently found our brand new, exactly what we were wanting, crib mattress at a garage sale for $5!I'll eventually put together a post with pictures of the rest of the nursery area once we get everything ready to go. :)
Monday, May 7, 2012
baby | 23 weeks, time management, and thoughts on going back to work post-baby
Not much to report this week from a pregnancy standpoint, except that baby J had a case of the hiccps a few days ago and my formerly innie belly button is well on its way to being an outie. Oh the adventures of pregnancy. :) Btw, it's super convenient that my pregnancy week rolls over on Sunday (it's usually the only day we have a chance to take a picture anyway) because that means the likelihood of snagging a picture on a day I've actually washed my hair goes up drastically.
On a slightly more serious note, I thought I might share a few of the things on my mind lately.
Here's the deal with my job - I really honestly look forward to going to work in the morning. I never thought I would love working as a nanny this much, or at all really, but I do. I definitely didn't want to be a nanny when I first started looking for jobs here in Fort Wayne. I wanted a job that would fit with my past work experience and would be a stepping stone to a potential career. Instead God provided a job working as a nanny. Which has turned out to be a stepping stone to the "career" I really wanted all along: motherhood. I couldn't be more thankful. Like any job, working as a nanny has its benefits and downsides. The money is good and completely supports our little family while Isaac is in seminary (really, can we even ask for anything more?!) but it's probably not what I could make at a "real" job. I work 50 hours a week and leave the house around 6:45 am every morning (which was certainly an adjustment for me), but I get home at a good time every day and never have to work nights or weekends. I'm not building my resume the way most would accept, but I've learned more about flexibility, discipline, and balance in my 9 months as a nanny than I thought possible (and aren't those valuable skills at any job?). However, the greatest benefit of all is that I get to take my sweet baby girl to work with me once she's born. I've told Isaac that I feel like I get to experience the best of both worlds. I get to be a "stay at home mom" in the sense that I get to be with our daughter even if it's not actually in our home, and I get to be a "working mom" in the sense that I get to help provide for our family in this current situation to which God has called us. On a side note, I think that's the biggest thing people miss in the working mom vs. stay at home mom debate -- God doesn't call everyone to the exact same vocation. Thank goodness! Some he calls to give some of their time outside the home to a traditional job helping to provide for their families. Some he calls to other jobs outside the home, Sunday school teachers, school volunteers, VBS leaders, etc. Some he calls to serve full-time in the home -- not an easy job by any means. And to further complicate things (but in a good way) none of us are called to just one vocation. I'm called as a wife, mother, employee, daughter, sister, friend, etc. How silly that I might try to limit the work God has for me by only accepting certain "titles". Now, lest you think me completely unaware of the reality of life, I know it's going to be rough (Really rough? Super crazy rough? Guess we'll see in a couple months...) at first while we adjust to having a new baby and attempt to get all three of us out the door on time every morning. And while I have yet to experience the utter exhaustion myself, I've heard from plenty of moms about the trials of being up all night with a fussy baby. No one ever said it was going to be easy, but most people tell me it's totally worth it. :)
Ok, back to my main point: with Isaac's workload at the seminary and me working longer hours as a nanny, we have this ever growing recognition of the need for balance in our life. Balance between home and work, and once we are home balance between housework and rest. Pregnancy has made this all the clearer because as much as I sometimes hate to admit it, rest (not even sleep necessarily, just honest to goodness rest) is becoming an ever greater priority. Finding that balance between doing enough but not overdoing it is tough. Sometimes it means leaving the laundry unfinished and going to bed a little early but sometimes it means staying up anyway to pay the bills, finish the dishes, or make sure lunches are ready to go for the next day. I can't do anything to add more time to my day so instead I've been trying to be more efficient about the way I spend my time. Especially when there are lots of baby projects I want to work on too. :) I find that having and sticking to a plan helps the most when it comes to housework. Housework is one of those things where you can survive, if you have to, with very minimal effort but your quality of life is seriously reduced.
Since I know I'll have even less time for housework once the baby arrives, I've been trying to streamline the process and create new routines and habits right now that will hopefully help calm the chaos once I go back to work with the baby. I have a couple Martha Stewart printable cleaning lists that I love (you can read about them here), but they have one flaw. Although they tell me what chores need to be done, they don't tell me how to find the time to actually do them all. I recently found a really simple, straightforward cleaning list with each high-traffic room in your home assigned to a day of the week and a list of things to do to keep that room clean and maintained.
Now I have my what and my how. The way she organizes the list only assigns specific rooms to weekdays, but I'm not sure if it's entirely practical. I usually have to do some catch up on the weekends but the basic idea and organization is excellent. Also, since we don't have a "kids bathroom", instead I work on our office/spare room on Thursdays. My favorite part is how your work for each day is separated into a half hour of overall home maintenance and then a half hour of specific room cleaning/organizing. I've been doing my maintenance half hour in the morning before work and then my specified room when I get home because a half hour of chores after work seems so much more doable after a long day than a whole hour. Now, as she says in her post, following this list won't give you a perfect home. However, this whole idea of efficiency and using my time wisely isn't in the pursuit of perfection, it's in the pursuit of serving my family to the best of my ability with the time and resources God has blessed me with. For us, following this list gives us a livable, pleasant home. Actually, when I started using this list I didn't happen to mention to Isaac that I was doing anything different. After about a week he commented on how nice our home was looking and how I had been really on top of laundry lately (as opposed to my usual method of "crap, I really gotta put a load in.....tomorrow"). It was so encouraging that, even without him knowing I was doing anything specifically different, the effects of my efforts were apparent. Now that he knows about the plan, we've been tag teaming the pre-work half hour and getting twice as much done (or on some especially busy mornings, the same amount but in half the time). Score one for marital teamwork!
My sister-in-law passed along this cleaning schedule from the Time Warp Wife. In some ways I actually like this one more because it's a little more detailed and includes laundry. However, since it includes more duties it also requires more daily time, something I can't always do. I really like being able to mentally check off a day and know that I did everything on the list instead of thinking, "well at least I did most of it". However, I definitely think I'll be using this list as a reference sheet for days when I have more time to clean or want to put in a little extra effort like before company comes.
On a slightly more serious note, I thought I might share a few of the things on my mind lately.
Here's the deal with my job - I really honestly look forward to going to work in the morning. I never thought I would love working as a nanny this much, or at all really, but I do. I definitely didn't want to be a nanny when I first started looking for jobs here in Fort Wayne. I wanted a job that would fit with my past work experience and would be a stepping stone to a potential career. Instead God provided a job working as a nanny. Which has turned out to be a stepping stone to the "career" I really wanted all along: motherhood. I couldn't be more thankful. Like any job, working as a nanny has its benefits and downsides. The money is good and completely supports our little family while Isaac is in seminary (really, can we even ask for anything more?!) but it's probably not what I could make at a "real" job. I work 50 hours a week and leave the house around 6:45 am every morning (which was certainly an adjustment for me), but I get home at a good time every day and never have to work nights or weekends. I'm not building my resume the way most would accept, but I've learned more about flexibility, discipline, and balance in my 9 months as a nanny than I thought possible (and aren't those valuable skills at any job?). However, the greatest benefit of all is that I get to take my sweet baby girl to work with me once she's born. I've told Isaac that I feel like I get to experience the best of both worlds. I get to be a "stay at home mom" in the sense that I get to be with our daughter even if it's not actually in our home, and I get to be a "working mom" in the sense that I get to help provide for our family in this current situation to which God has called us. On a side note, I think that's the biggest thing people miss in the working mom vs. stay at home mom debate -- God doesn't call everyone to the exact same vocation. Thank goodness! Some he calls to give some of their time outside the home to a traditional job helping to provide for their families. Some he calls to other jobs outside the home, Sunday school teachers, school volunteers, VBS leaders, etc. Some he calls to serve full-time in the home -- not an easy job by any means. And to further complicate things (but in a good way) none of us are called to just one vocation. I'm called as a wife, mother, employee, daughter, sister, friend, etc. How silly that I might try to limit the work God has for me by only accepting certain "titles". Now, lest you think me completely unaware of the reality of life, I know it's going to be rough (Really rough? Super crazy rough? Guess we'll see in a couple months...) at first while we adjust to having a new baby and attempt to get all three of us out the door on time every morning. And while I have yet to experience the utter exhaustion myself, I've heard from plenty of moms about the trials of being up all night with a fussy baby. No one ever said it was going to be easy, but most people tell me it's totally worth it. :)
Ok, back to my main point: with Isaac's workload at the seminary and me working longer hours as a nanny, we have this ever growing recognition of the need for balance in our life. Balance between home and work, and once we are home balance between housework and rest. Pregnancy has made this all the clearer because as much as I sometimes hate to admit it, rest (not even sleep necessarily, just honest to goodness rest) is becoming an ever greater priority. Finding that balance between doing enough but not overdoing it is tough. Sometimes it means leaving the laundry unfinished and going to bed a little early but sometimes it means staying up anyway to pay the bills, finish the dishes, or make sure lunches are ready to go for the next day. I can't do anything to add more time to my day so instead I've been trying to be more efficient about the way I spend my time. Especially when there are lots of baby projects I want to work on too. :) I find that having and sticking to a plan helps the most when it comes to housework. Housework is one of those things where you can survive, if you have to, with very minimal effort but your quality of life is seriously reduced.
Since I know I'll have even less time for housework once the baby arrives, I've been trying to streamline the process and create new routines and habits right now that will hopefully help calm the chaos once I go back to work with the baby. I have a couple Martha Stewart printable cleaning lists that I love (you can read about them here), but they have one flaw. Although they tell me what chores need to be done, they don't tell me how to find the time to actually do them all. I recently found a really simple, straightforward cleaning list with each high-traffic room in your home assigned to a day of the week and a list of things to do to keep that room clean and maintained.
![]() |
| via |
My sister-in-law passed along this cleaning schedule from the Time Warp Wife. In some ways I actually like this one more because it's a little more detailed and includes laundry. However, since it includes more duties it also requires more daily time, something I can't always do. I really like being able to mentally check off a day and know that I did everything on the list instead of thinking, "well at least I did most of it". However, I definitely think I'll be using this list as a reference sheet for days when I have more time to clean or want to put in a little extra effort like before company comes.
Monday, April 30, 2012
baby | diaper bag
First of all, a HUGE thank you to my mother-in-law for my brand new JJ Cole diaper bag! I love it and can't wait to put it to good use!
Even though I haven't actually used it with our baby yet, I can give you a quick review of a few of the features that I appreciate right off the bat:
1) It comes with awesome stroller grips. These little guys are super handy and keep your diaper bag in arms reach instead of stuffed under a stroller or thrown in the back of a shopping cart. Although they come with every JJ Cole diaper bag, you can purchase them separately here. They will work with any diaper bag that has a way to clip them in place (rings, loops, etc.).
2) It comes with a nice, coodinating changing pad. It's pretty standard for diaper bags to come with changing pads, but I specifically like this one because it has a velcro closure so that it actually stays folded up in the diaper bag.
3) Great overall size. Some people mentioned in reviews that they thought it was a little too big for one baby, but that's exactly what I was looking for since I'll be heading back to work and taking our baby with me. The first thing on my diaper bag necessity list was something that would be large enough for baby and toddler gear but not insanely big or bulky. This bag seems to be the ideal compromise. Plus, if we decide to go away for a night (maybe even a weekend) it's plenty big enough to be the only bag we pack for the baby.
4) Fantastic pocket size and location. This bag has eight well designed outside pockets and four inner pockets. Two small zippered pockets on the front (perfect for keys, cell phone, lipbalm, pacifier, etc.), two open-top pockets directly behind the zippered ones, and two more on the back side of the bag (just the right size for a book, Kindle, diaper, umbrella, etc.), and finally two end pockets, one specifically shaped for a bottle/sippy cup and one for a water bottle/travel mug for mom. Inside the bag there are 4 medium size pockets (diapers, wipes, snacks, clothes) lining a large open compartment with plenty of room for all the things that won't fit in pockets (sling/wrap, nursing cover, blankets).
| via |
5) I love that this bag doesn't automatically scream "diaper bag". It's actually styled a lot like a regular bag I would pick out for myself which is especially nice since I'll probably give up carrying a purse and just stick to this do-it-all bag once the baby arrives. I had originally selected a nice, man friendly, generic diaper bag, but when I showed it to Isaac he encouraged me to pick out something I really liked since I will be carrying it every single day for the foreseeable future. He even said he would happily help carry whatever "girly bag" I picked out in the evenings and on weekends when we get to be together as a family. :) While I would have been totally fine with the man bag, it was very kind of him to encourage me to pick out something fun.
6) It has stay-put handles and a shoulder strap! Not only are the handles long enough to comfortably sling over my shoulder (and not slide off!), but it has a shoulder strap for completely hands free carrying. With a newborn and two year old in tow, I have a feeling I'll be using the shoulder strap a lot.
If you're in the market for a diaper bag, be sure to check out all the JJ Cole offerings here.
sew | nursing cover
I made a nursing cover using this tutorial from Prudent Baby (a fantastic DIY website, definitely check it out).
I made a couple changes from the tutorial. I did two coordinating fabrics instead of all one pattern. For two fabrics, get 3/4 yard of your main cover fabric and 1/4 yard of your accent fabric. I did my straps and a 5 inch pannel along the bottom in the accent fabric. Just remember to cut your main cover fabric about 5 inches shorter than the tutorial calls for unless you want a really long cover. I used a french seam and top stitching to attach the two pannels together for a really nice, clean look. I also used a longer length of boning in this cover. It was only 2 inches longer (16 inches instead of 14), but I found it a little more comfortable that way. Totally a matter of preference though.
Added bonus, until the kid gets here I can use it as a giant bib for the insane amount of food I'll be consuming between now and then.
I made a couple changes from the tutorial. I did two coordinating fabrics instead of all one pattern. For two fabrics, get 3/4 yard of your main cover fabric and 1/4 yard of your accent fabric. I did my straps and a 5 inch pannel along the bottom in the accent fabric. Just remember to cut your main cover fabric about 5 inches shorter than the tutorial calls for unless you want a really long cover. I used a french seam and top stitching to attach the two pannels together for a really nice, clean look. I also used a longer length of boning in this cover. It was only 2 inches longer (16 inches instead of 14), but I found it a little more comfortable that way. Totally a matter of preference though.
Added bonus, until the kid gets here I can use it as a giant bib for the insane amount of food I'll be consuming between now and then.
Monday, April 23, 2012
sew | maternity skirt tutorial
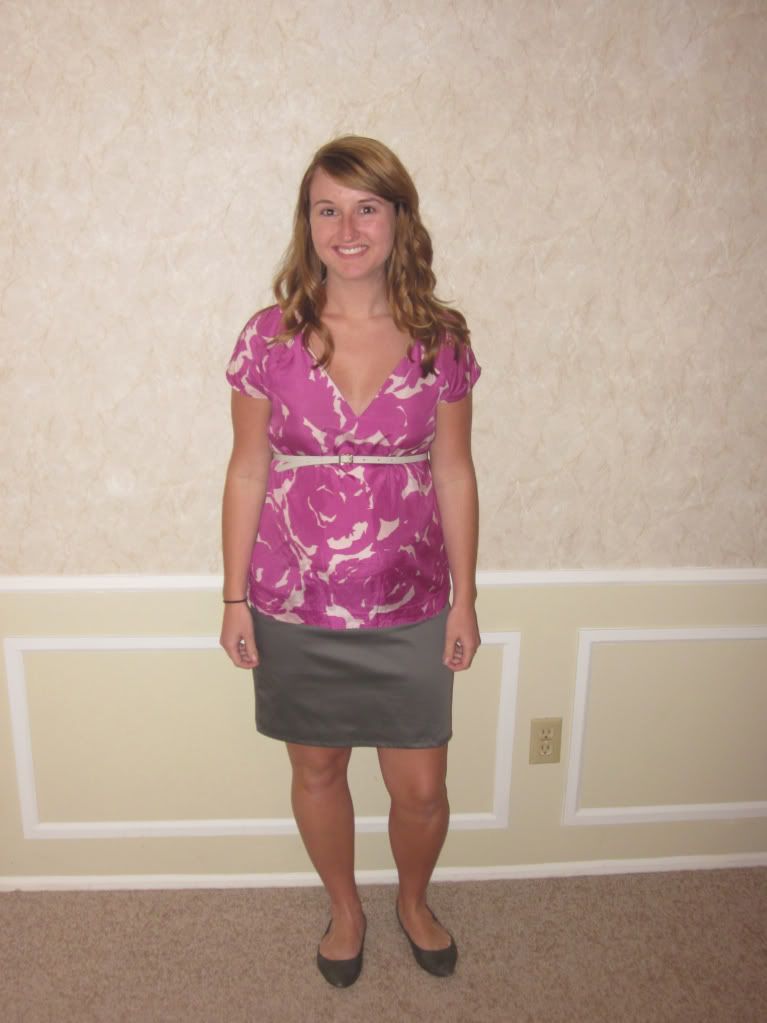
I wanted this skirt to be really simple and quick to make. Only one pattern piece, two straight seams, one basic hem, and a piece of thick elastic for the top. There are lots of ways you could dress it up with buttons, pockets, etc., but I'll give you the basics and let you come up with the rest. I specifically wanted a straight skirt that could be dressed up or down. Most maternity skirts (especially summer ones) are very casual and either pretty full or very flowy and loose. Especially since I have a little somethin' going on the the hip region already, all the fabric in those styles can actually exaggerate the very area I would like to streamline. Straight skirts are still quite comfortable but just a little more versatile. Essentially this just the bottom half of a pencil skirt with elastic below your belly instead of being form fitting all the way to your waist. I made this one on the shorter side to be worn with sandals and flats and then another one in gray (you can see it below) that is a couple inches longer so I can wear it with heels to church.
Lighter fabrics like my linen will also need a lining (so that means 3/4 yard of lining fabric as well)
Coordinating thread
3 in thick elastic (and Rit dye if you feel so inclined)
Pins
A fabric or water soluble pen or marker
Pattern piece page 1
Pattern piece page 2
Download and print the pattern (please select "fill entire paper" while printing to get the correct sizing). You don't need to overlap the edges of the two papers, just line up the asterisks and the solid black lines and tape together. Cut off the excess to the left of the solid black line.
The pattern is approximately a size 4 petite -- I based it off of a non-maternity size 4 petite skirt that I have from Target. The length of the skirt pattern is going to be closer to the gray one (pictured below) than the red one (pictured above). I figured it's always easier to make a skirt a little shorter than longer so I'm giving you a little more margin to work with initially. A seam allowance of approximately 1/3 inch is included in the pattern.
To make the pattern bigger, smaller, shorter, or longer, just trace the pattern piece on a sheet of tissue paper and then measure out/in an inch or two, draw your new lines, and cut out your new pattern piece. Like I mentioned above, it's always better to start out too big since you can always cut a little more off, but if you start too small you're just out of luck.
Fold your (washed and dried) fabric in half and lay your pattern piece out flat on it. Pin it in place along the center fold and cut around the edge. Repin and cut a second identical pattern piece. When you take out the pins you should have two identical skirt shaped fabric pieces. Pin the right sides together and sew a straight seam down each of the sides. Now you should have a skirt shaped tube of fabric. To make the hem, fold the bottom edge of the skirt under about a 1/2 an inch and iron (this will help give you a nice smooth hem). Fold the edge over another 1/2 an inch and iron again. Sew the hem all the way around. If you are making a lining for your skirt, go back to the beginning of the directions and repeat everything for the lining up to this point.
Now you should have one skirt tube and possibly one lining tube. Next we make the waistband. Take your 3 inch elastic and pull it snug around your waist just a little under you belly. Leaving an extra half inch on either end for your seam, cut the elastic. Pin the edges of the elastic together and sew a straight seam to form the waistband. Go ahead and pull the waistband up over your hips and around your belly to make sure it fits and is comfortable. Now pin the lining into the skirt just around the top edge and (careful, watch out for pins!) slide both up over your hips and under the band of the elastic (you're still wearing it right?). The elastic will hold up the skirt temporarily and allow you to mark where you want to sew the elastic in place. Now is the time to adjust the length, pull the elastic down a little lower in the front (it should cradle your belly) and generally check for sizing and fit. If anything needs to be adjusted, it will be a lot easier to do before you sew the elastic in place. Now, while you're still wearing the skirt, take your fabric pen and draw a line on the fabric right along the edge of the elastic (you may need to grab someone to help you mark the back). Slide everything off and cut the fabric and lining about 3/4 of an inch above the line you just marked.
This next part gets a tad confusing but bear with me. Take your lining, turn it inside out, and slide it up over the outside of your skirt. Make sure the front side (with the dip for your belly) is lined up. Pin the top edges together and sew the two pieces of fabric together all the way around the top. Flip the lining down inside the skirt where it should be and you have a nice finished edge along the top.
Now pin your elastic waistband to the top edge of the skirt (overlapping the skirt about a 1/2 inch), stretching the elastic a little as needed, so that it is secured at several points all the way around. Sew a seam along the bottom edge of the elastic securing it to the skirt. You're done!
A few notes:
I dyed my elastic so it would at least be in the same color family as my skirt. You probably won't ever be able to get it to match exactly but it can be better than bright white (although the waistband doesn't show at all anyways!).
My elastic band was slightly smaller than my skirt so I stretched it slightly as I sewed so it was somewhat even all the way around. However, don't worry if one section of your skirt is a tad more "puckered" when you sew it because once you have it on it all gets stretched out and you won't be able to tell at all.
Here's the longer (but otherwise exactly the same) gray version:
Supplies:
Approximately 3/4 yard fabric (I used linen suiting for the red and stretch satin for the gray but any heavier non-stretchy or slightly stretchy apparel fabric will work)Lighter fabrics like my linen will also need a lining (so that means 3/4 yard of lining fabric as well)
Coordinating thread
3 in thick elastic (and Rit dye if you feel so inclined)
Pins
A fabric or water soluble pen or marker
Pattern piece page 1
Pattern piece page 2
Download and print the pattern (please select "fill entire paper" while printing to get the correct sizing). You don't need to overlap the edges of the two papers, just line up the asterisks and the solid black lines and tape together. Cut off the excess to the left of the solid black line.
The pattern is approximately a size 4 petite -- I based it off of a non-maternity size 4 petite skirt that I have from Target. The length of the skirt pattern is going to be closer to the gray one (pictured below) than the red one (pictured above). I figured it's always easier to make a skirt a little shorter than longer so I'm giving you a little more margin to work with initially. A seam allowance of approximately 1/3 inch is included in the pattern.
To make the pattern bigger, smaller, shorter, or longer, just trace the pattern piece on a sheet of tissue paper and then measure out/in an inch or two, draw your new lines, and cut out your new pattern piece. Like I mentioned above, it's always better to start out too big since you can always cut a little more off, but if you start too small you're just out of luck.
Fold your (washed and dried) fabric in half and lay your pattern piece out flat on it. Pin it in place along the center fold and cut around the edge. Repin and cut a second identical pattern piece. When you take out the pins you should have two identical skirt shaped fabric pieces. Pin the right sides together and sew a straight seam down each of the sides. Now you should have a skirt shaped tube of fabric. To make the hem, fold the bottom edge of the skirt under about a 1/2 an inch and iron (this will help give you a nice smooth hem). Fold the edge over another 1/2 an inch and iron again. Sew the hem all the way around. If you are making a lining for your skirt, go back to the beginning of the directions and repeat everything for the lining up to this point.
Now you should have one skirt tube and possibly one lining tube. Next we make the waistband. Take your 3 inch elastic and pull it snug around your waist just a little under you belly. Leaving an extra half inch on either end for your seam, cut the elastic. Pin the edges of the elastic together and sew a straight seam to form the waistband. Go ahead and pull the waistband up over your hips and around your belly to make sure it fits and is comfortable. Now pin the lining into the skirt just around the top edge and (careful, watch out for pins!) slide both up over your hips and under the band of the elastic (you're still wearing it right?). The elastic will hold up the skirt temporarily and allow you to mark where you want to sew the elastic in place. Now is the time to adjust the length, pull the elastic down a little lower in the front (it should cradle your belly) and generally check for sizing and fit. If anything needs to be adjusted, it will be a lot easier to do before you sew the elastic in place. Now, while you're still wearing the skirt, take your fabric pen and draw a line on the fabric right along the edge of the elastic (you may need to grab someone to help you mark the back). Slide everything off and cut the fabric and lining about 3/4 of an inch above the line you just marked.
This next part gets a tad confusing but bear with me. Take your lining, turn it inside out, and slide it up over the outside of your skirt. Make sure the front side (with the dip for your belly) is lined up. Pin the top edges together and sew the two pieces of fabric together all the way around the top. Flip the lining down inside the skirt where it should be and you have a nice finished edge along the top.
Now pin your elastic waistband to the top edge of the skirt (overlapping the skirt about a 1/2 inch), stretching the elastic a little as needed, so that it is secured at several points all the way around. Sew a seam along the bottom edge of the elastic securing it to the skirt. You're done!
A few notes:
I dyed my elastic so it would at least be in the same color family as my skirt. You probably won't ever be able to get it to match exactly but it can be better than bright white (although the waistband doesn't show at all anyways!).
My elastic band was slightly smaller than my skirt so I stretched it slightly as I sewed so it was somewhat even all the way around. However, don't worry if one section of your skirt is a tad more "puckered" when you sew it because once you have it on it all gets stretched out and you won't be able to tell at all.
Here's the longer (but otherwise exactly the same) gray version:
A quick note on cost:
The fabric for each skirt cost me $3.46 and the elastic was $1.37 for a total of $4.83/skirt. I had the lining left over from another project but lining is dirt cheap anyways and usually worth every penny.
Subscribe to:
Posts (Atom)